How to Lay Paving on Sand and Cement: Expert Advice and Tips
Related Posts
-

Inside‑Out Living & Patios: Inspired by George Clarke’s Kitchen vs Garden
Inside‑Out Living & Patios: Inspired by George Clarke’s Kitchen vs Garden Why Inside‑Out Living Is Having a M...
-

The Mental Health Benefits of Creating an Outdoor Living Area & Patio
The Mental Health Benefits of Creating an Outdoor Living Area & Patio Discover how an outdoor living area or pat...
-

How Indian Sandstone is Mined: From Quarry to Your Garden
How Indian Sandstone is Mined: From Quarry to Your Garden Indian sandstone is a popular natural stone used across the...
-

The Ultimate Guide to Porcelain Grout: Perfect for Paving, Walling & Cladding
The Ultimate Guide to Porcelain Grout: Perfect for Paving, Walling & Cladding Porcelain tiles and slabs are rapid...
-

Transform Your Garden with a Standalone Water Feature: Benefits & Maintenance Tips
Transform Your Garden with a Standalone Water Feature: Benefits & Maintenance Tips Looking to add a touch of tran...
-

RHS Flower Shows 2025: Your Complete Guide
🌸 RHS Flower Shows 2025: Your Complete Guide The Royal Horticultural Society continues to wow visitors with its premi...
-

What to Consider When Choosing a Professional Landscaper for Your Perfect Outdoor Living Space
Title: What to Consider When Choosing a Professional Landscaper for Your Perfect Outdoor Living Space When it comes t...
-

Transform Your Outdoor Space with Porcelain Walling Cladding | Paving Shopper
Transform Your Outdoor Space with Porcelain Walling Cladding | Paving Shopper Are you looking to enhance your garden ...
-

Natural Sandstone Paving: Styles, Colours & Features for 2025 Garden Projects
🪨 Natural Sandstone Paving: Styles, Colours & Features for 2025 Garden Projects Meta description:Discover the tim...
-

Natural Sandstone Paving: Styles, Features & Why It Remains a Timeless Choice
🪨 Natural Sandstone Paving: Styles, Features & Why It Remains a Timeless Choice When it comes to paving that deli...
-

Top Landscaping Trends and Styles in 2025: What’s Hot in Outdoor Design
🌿 Top Landscaping Trends and Styles in 2025: What’s Hot in Outdoor Design As we move through 2025, the world of lands...
-

Why Composite Decking is a Smart Investment for Your Outdoor Space
Why Composite Decking is a Smart Investment for Your Outdoor Space When it comes to creating the perfect outdoor livi...
-

Why Choosing the Right Garden Designer is Crucial for Transforming Your Outdoor Space
Why Choosing the Right Garden Designer is Crucial for Transforming Your Outdoor Space When it comes to turning your g...
-

Kandla Grey Sandstone: The Timeless Patio Favourite for UK Gardens
Kandla Grey Sandstone: The Timeless Patio Favourite for UK Gardens Looking to transform your outdoor space with a mod...
-

Best Porcelain Paving for UK Gardens: A 2025 Guide
Porcelain paving has become the top choice for homeowners and landscapers across the UK—and for good reason. It’s sty...
-

Pros and Cons of Porcelain Pavers: A Smart Choice for Modern Landscaping
Porcelain pavers are gaining popularity in landscaping projects for their sleek appearance and long-lasting durabilit...
-

UK Garden Statistics and Trends 2024
UK Garden Statistics and Trends 2024 General UK Garden Statistics The vast majority of UK households have access to ...
-
Can I lay Paving on Soil or Mud?
Technically, yes – you can lay paving stones or slabs directly onto exposed topsoil however, laying a sub-base will e...
-

How Much Does a New Patio Cost?
A new patio in the UK typically costs between £80-£150 per square meter. For a 40-50 sqm patio, expect to pay £2,000-...
-

What Different Sizes Do Paving Slabs Come In?
When planning a patio or outdoor paving project, one of the key decisions is choosing the right size paving slabs. ...
-

Can You Pressure Wash Indian Sandstone?
Indian sandstone is a popular choice for outdoor paving due to its durability and attractive appearance. However, li...
-
Is Sandstone Paving Permeable? Is it porous?
Sandstone's porous nature enables it to absorb rainfall, qualifying it as a permeable paving variety. However, seali...
-

Where Does Natural Sandstone Paving Come From?
Sandstone begins deep underground, formed over eras as minerals and sediments fused under pressure. Powerful forces ...
-

5 Paving Ideas for Small Gardens: Maximise Your Outdoor Space
Front of House When considering paving ideas for the front of your house, it's crucial to select ones that complem...
-

9 Paving Ideas for Front of House: Enhancing Curb Appeal with Style
The facade of a house plays a pivotal role in defining its character and curb appeal, and the choice of paving can s...
-

9 Summer Garden Paving Ideas UK
Summer gardens offer a vibrant canvas for homeowners to express their style while enhancing outdoor living spaces. G...
-

8 Garden Paving Ideas for 2024
It's time to refresh your garden's look for 2024 and an easy way to do that is with some new paving. With so many opt...
-
How to remove moss from patio paving
Moss growth is a common issue for patio paving, especially in damp, shaded areas. While moss may seem harmless, it ca...
-

How much does sandstone paving cost?
When choosing new garden pavers, sandstone offers homeowners an enticing middle-ground - more durable than basic conc...
-
Why Do Paving Slabs Crack And How To Repair Them
Seeing cracks appear on your patio or driveway can be disheartening after investing time and money into installing be...
-

How to lay paving in winter (Tips & Tricks)
How Cold Temperatures Impact Paving Projects The primary concern when working in cold weather is ensuring proper curi...
-

Sub Bases For Patios
Building the Perfect Patio Base: A Comprehensive Guide When planning an outdoor living space, understanding proper ba...
-
Pros and Cons of Porcelain Paving
Are you considering adding porcelain paving to your outdoor space? It's important to weigh the pros and cons before ...
-

Understanding Paving Slip Ratings: A Comprehensive Guide
A paving slip rating, also known as a slip resistance or anti-slip rating, is a measure of how slippery a surface...
-

Stunning Garden Water Feature Ideas - Enhance Your Outdoor Space
Garden water features are decorative elements that incorporate water into a garden, adding beauty and a sense of ...
-
How to Stop Weeds in Block Paving: Expert Tips andTricks
Weeds growing between the blocks of your paving can be an unsightly and frustrating problem. Not only do they make y...
-
How to clean paving without a pressure washer
A patio cleaner is a cleaning solution designed specifically for removing dirt, grime, and stains from outdoor patio...
-

How to Grout Paving Slabs – Expert Tips and Techniques
Pointing paving slabs is an important step in the process of installing them. Grout is a mixture of cement, water...
-
Block Paving Guide | What Does it Cost? | How Much Per m2?
Block paving is a versatile and durable option for creating driveways, patios, and paths. This method involves using...
-
Porcelain VS Ceramic Paving
Porcelain paving is non-porous and more durable than ceramic paving, which is more porous and prone to stains and wea...
-
Sandstone V Porcelain Paving - (Style Comparison and Distinctions)
When choosing materials for your patio or driveway, two of the most popular options are sandstone paving slabs and p...
-

Understanding Gradients and Falls for Paving and Drainage (2024)
When it comes to paving and drainage projects, understanding the correct gradients and falls is essential for ensuri...
-
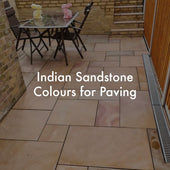
Indian Sandstone Paving Colours for A Patio - A Comprehensive Guide
Indian sandstone is one of the most popular paving materials, celebrated for its natural beauty and the variety of co...
-
Jointing and Pointing For Paving (Sand & Cement Mix)
Patio pointing is important for both looks and durability. It protects the layers under your paving, stops weeds, and...
-

Pros and Cons of Sandstone Paving
Pros & Cons of Indian Sandstone Paving Indian sandstone paving is a natural and durable option that adds both bea...
-
Does Patio Paving Need Edging? A Comprehensive Guide
In this article, we'll explore the importance of patio edging, the different types of edging materials available, and...
-
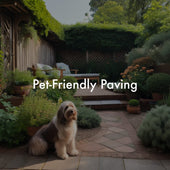
Pet Friendly Paving - What is the best paving for a dog-friendly garden?
Creating a dog-friendly garden requires choosing the right paving materials to ensure your furry friends can enjoy t...
-

Patio Paving Laying Patterns Guide
Paving patterns can transform an ordinary outdoor space into a stunning and eye-catching area that complements your ...
-
Patio Kits vs Single Size Paving Slabs: Which To Choose?
When designing a patio or outdoor space, one crucial decision is whether to use a patio kit (also known as patio pack...